top of page

Maker Project(s)
Cornhole Boards
In the middle of what seemed like the endless summer of quarantine I had a sudden urge to make something. Specifically, I wanted to make something that that incorporated "social distancing." I've always been a fan of games, from board games, to video games, to sports, and so the idea of creating my own game became intriguing. Once I tied in the social distancing aspect there was no better option than cornhole.

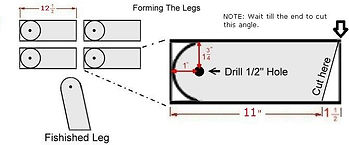
I ran down to my local hardware store and purchased some 2x4s and ply wood and got to work. I am fortunate enough to have a table saw at my parents house that I was able to use to cut everything to the correct dimensions. I used the pictures to the right to determine how long I needed all of my pieces and then got to measuring and cutting. Making sure to double check all of my measures as to not make any silly mistakes.
Unfortunately I did not take any pictures throughout the process of cutting, so the only picture I have is the final construction seen above.

Once I finished with the construction I dusted off any excess debris and, despite the cool grain of the plywood, slapped a couple layers on primer on each board so I could add my own personal touch to them.
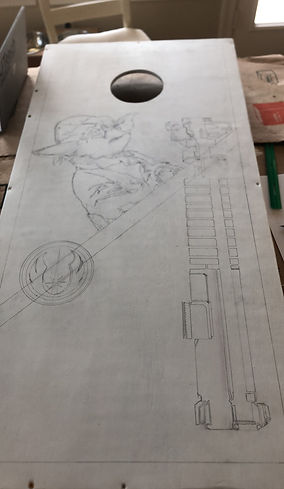
Being the Star Wars nerd that I am I decided to theme them to the Jedi Vs. the Sith and got to drawing. As you can see in the pictures there are plenty of eraser marks from where I wasn't happy with the design and decided to tweak it.


After spending an evening drawing, I decided to sleep and started painting the next day.
I quickly found out that painting is not only back braking but is also quirte arduous work. It took me another evening to paint the Jedi cornhole board.
Once I was done, I noticed that the Darth Vader on the other board was quite a bit lower than the Yoda, so I got to work on redrawing it before I called it a night.
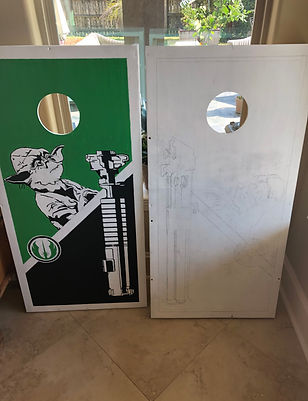

Finally, after another morning of painting, I was finished with both of the boards, and very happy with the results :)
However, I was not completely finished just yet. An important key to cornhole are the bags to be thrown, and it would not be a proper homemade project without making them myself.
So I went to my local craft store to by duck canvas linen, and thread, and finally the corn kernels to put in my bags.
Luckily, a friend of mine in town had both a sewing machine and an embroidery machine that I was able to borrow to create the bags.
Through my experience at The Foundry I was able to apply some skills that I had learned in sewing and embroidery to theme them to match my boards.
Overall I loved this project. It gave me an opportunity to develop and put to use a lot of skills I had not previously had experience, such as using saws and even painting, and ultimately ended with me having a fun game I can play with guests (whenever COVID is finally gone).

Iron Man Helmet (unfinished)
Growing up, like many kids, I had (and still do have) a love for superheroes and the idea of overcoming adversity to "save the world." However, there was always one superhero that always stuck out to me: Iron Man.
Iron Man/Tony Stark is not a superhero by the common definition of an individual who has "special powers" like super strength or super speed. Instead what he does have is an incredible brain, and a will to create.
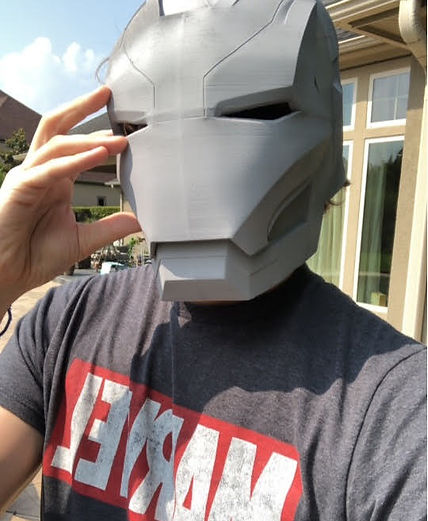
In many ways, I see Iron Man/Tony Stark as the "Ultimate Maker." So when I was originally thinking of what I wanted to do for my maker project, the idea of crafting an Iron Man helmet was an easy choice. Unfortunately, to this point I have yet to FULLY complete it, but here is a glimpse of the process so far.
In the video above you can see a sped of print of one of my 20 pieces. Due to the many curves and fine details of the pieces I found that it was very important to print each piece on the high detail setting on Cura, the 3D printer software used at the Foundry. On average these prints could took anywhere from 1 to 3 hours per piece.
At the Foundry there are always a variety of filament colors to choose from at any time but, as you'll notice in the picture to the right, I tried to keep almost all of my pieces white for ease of access when painting.
Once I had the pieces nicely sanded it was time to begin the assembly of the helmet. This part of the process required some precision. Through some experimenting, I found the most suitable way for me to attach the pieces to be using super glue between the pieces to create an initial bond. Once the glue had dried I would use the plastic soldering iron on the inside of the helmet to pull some of the material from one piece over onto the adjacent piece. Once this cooled it would create an even stronger bond to hold the pieces together.
The video to the right showcases the supergluing process.
Through my internship at The Foundry I had immediate access to 3D printers which was a very key component to this project. I was able to find a design on Thingiverse, a collaborative website where individuals share their 3D designs with anyone who wants them, that I liked and it was already in 20 pieces. This was a big factor my choice in design as it allowed me to print in parts and not hog a 3D printer for multiple days.

The printing of the pieces was certainly the longest process of this whole project, but once I had accumulated my pieces it was time to start sanding any extraneous material that sometimes accumulates on prints. This can commonly happen if a print has a curve of more than 45 degrees or so which will usually require a supports to ensure proper printing.
In the video to the left you will find me sanding and using an exacto knife to remove some excess material.

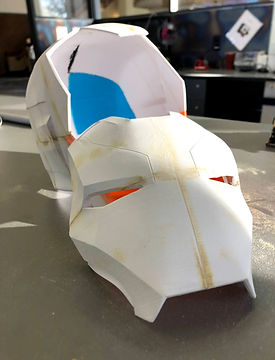
I quickly noticed that some of the pieces had warped and did not align completely (see top and front of mask to left, despite sitting at same point in the bottom back). This is a common issue when printing.
I did some research and found that PLA filament can be manipulated when subdued in piping hot water. So I went to our break room, took our kettle, found a large glass bowl and began to heat up my water (see right).
Once it was all set up I quickly submerged my pieces and found that the pieces became incredibly malleable for just a few seconds after being placed in the hot water. Just enough time for me to fix most of the warping.


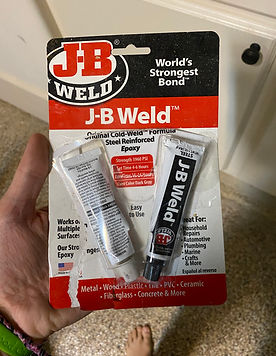
Next I wanted to fill lines created from the separate pieces as well as little impurities in the prints. Upon using the trusty Google, I found a recommendation to use a wood filler as it was not heavily potent like most fillers and was both sandable and easy to coat with paint.
Above you can see the application of it to the helmet and then the sanded additions below and bottom left.


To the left you can see my first fit check, which I was very pleased with.
To the right you can see the aftermath of when my roommate dropped the facemask later that evening. Fortunately, it split down the piece connections so some simple super glue and soldering was able to fix it right up.


.jpg)
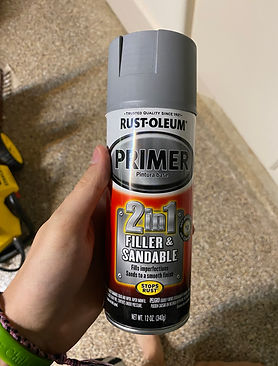
I opted to prime the helmet with the above spray paint to try to once again fill any little blemishes. As is often said, paint shows all. So I actually found a few more and opted to try to fill them with an epoxy, shown below. This lead to me having to then sand the helmet once more and then prime it once more.
.jpg)

_JPG.jpg)
This is the current (unfinished) state of the helmet. I am currently incredibly pleased with it, but I still have big hopes for the rest of it. I plan to paint it the original Iron Man red and gold and add electronics at some point. I would like to both backlight the eyes as well as create a button activated hinge system to open and close the front of the mask.
Overall this has probably been my most time consuming project and still has a lot to go. However, it has been such an incredible learning experience. I felt like I was pretty well versed with 3D printing before this project, but I am now even more confident in my abilities to tackle different issues with the medium. I do not have much experience with electronics but I look forward to gaining more knowledge on that as I continue to progress with this project.
Stay tuned! :)
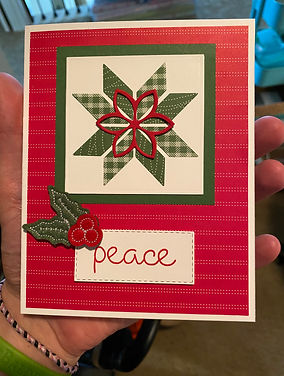
Christmas Gifts

There are few things I love more than giving gifts.
Through various maker workshops and a little of my own exploration I have had the opportunity to make some pretty neat Christmas gifts over the years.
Here is just a taste of some of them.


Little Projects and Gifts
The following are some examples of little creations I've made with various tools and mediums.
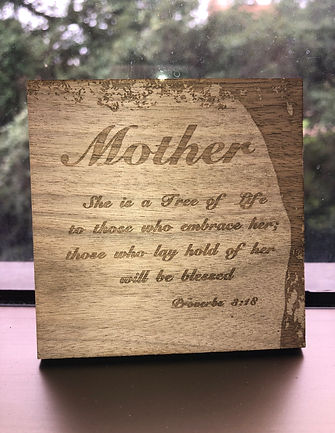
Laser Cutter


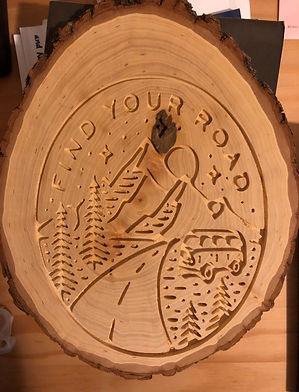
Wood Carvey Mills

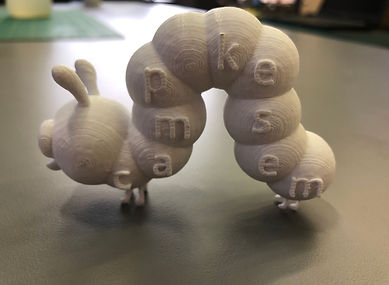
3D Prints


Lego Art


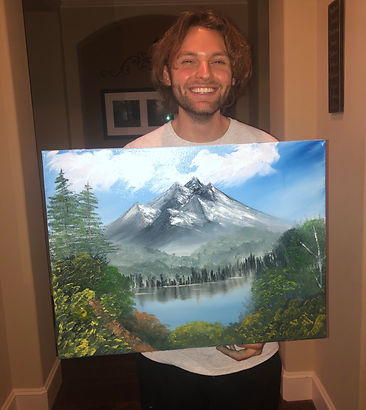
Other
.jpg)


bottom of page